Upgrading Linux Mint 20 Cinnamon (Ulyana) on Macbook Pro

Recently, Linux Mint 20 (code named Ulyana) was released and I was itching to upgrade from Linux Mint 19.3 (Tricia). However, I was not sure whether I can upgrade directly from version 19.x to 20 since I remember installing version 19 (Tara) freshly instead of upgrading from earlier version 18.3 (Sylvia) as there was some difficulty in performing system backup using Timeshift without which I could not upgrade.

I order t try my luck, I searched internet. There were many blogs and tutorials for the same. The oficial instructions are found on here

Here is what I had to do primarly on my Macbook Pro.

  • Upgraded to latest version of Oracle Virtual Box (version 6.1)
  • Logged into Linux Mint 19.3 on the VM
  • Using update manager, updated all the softwares to latest versions
  • Disabled PPAs and third party repositories
  • Installed mintupgrade commandline tool  – sudo apt install mintupgrade
  • performed check using command – mintupgrade check
  • dowloaded the packages using command –  mintupgrade download
  • installed upgrade using command – mintupgrade upgrade

The entire process took little more than 2 hours. This way, I am able to retain all the installed apps on the previous version.


Tumbleweed, the rolling penguin

Tumbleweed is a rolling release of openSUSE linux. It is always a good feeling to have the latest and upto date version of all the software. The is no need to wait for the next release cycle.

I always wanted to have Tumbleweed installed on my Macbook Pro as Parallels Desktop along with my regular Linux Mint 18.3 Cinnamon desktop.

openSUSE Tumbleweed dvd image can be downloaded from – https://software.opensuse.org/distributions/tumbleweed It is usually a big file  (4.7 GB) with multiple installation options bundled. It generally offers KDE Plasma and GNOME desktop environments.

I like the KDE plasma desktop and installed on the VirtualBox (2 GB RAM and 20 GB HD space) as there is no support for Desktop Parallels tools for openSUSE. The installation is very easy and took me about 20 minutes. Once I restarted and started the Tumble VirtualBox, I was presented with login screen. The login image can be configured from the system settings, user manager.

Screen Shot 2018-07-15 at 10.28.35 AM

Screen Shot 2018-07-15 at 11.21.18 AM.png

Since this is a rolling release, it has the latest stable version of all software


Screen Shot 2018-07-15 at 11.23.16 AMScreen Shot 2018-07-15 at 11.23.55 AM

The notification bar is showing me details on the software updates currently available.

Screen Shot 2018-07-15 at 11.31.55 AM.png

Screen Shot 2018-07-15 at 11.34.17 AM.png

Installing Linux Mint 19 Cinnamon (Tara) on Macbook Pro

After a long wait, Linux Mint 19 – code named Tara is finally released. Details of the release are on the page –> https://blog.linuxmint.com/?p=3597 and I have downloaded the Cinnamon Desktop ISO from the torrent page –> https://torrents.linuxmint.com/torrents/linuxmint-19-cinnamon-64bit.iso.torrent

I am already using Linux Mint 18.3 (Sylvia) Cinnamon running on Desktop Parallels on my Macbook Pro and I wanted to upgrade to Tara. Upgrade instructions are on the following page –> https://community.linuxmint.com/tutorial/view/2416

There are couple of things I noted on this page

  • Linux Mint 18.3 will be supported till year 2021
  • Did you try Linux Mint 19 ?

Hence I wanted to first try installing Linux Mint 19 as a separate parallels installation before upgrade. I installed the usual way as described in an earlier blog –> https://teaslegourd.wordpress.com/2016/07/03/installing-linux-mint-18-cinnamon-sarah-on-macbook-pro/

However, when I tried first step post installation i.e., Parallels tools installation, it failed surprisingly. Disappointed, I searched for solution but could not find any at this point. Looks like there is no support currently for Ubuntu version on which Mint is built.

Hence installed Linux Mint 19 on Virtual Box.

Oracle Virtual Box is a VM software similar to Desktop Parallels. It is free to download from https://www.virtualbox.org/ 

Please note in the below images, the Hard disk size selected is 90 GB in my case (not 8 GB as Mint needs more than 10 GB)

Screen Shot 2018-07-10 at 8.33.55 AMScreen Shot 2018-07-10 at 8.34.21 AMScreen Shot 2018-07-10 at 8.35.36 AMScreen Shot 2018-07-10 at 8.35.49 AMScreen Shot 2018-07-10 at 8.36.02 AMScreen Shot 2018-07-10 at 8.36.12 AMScreen Shot 2018-07-10 at 8.36.24 AM

Screen Shot 2018-07-10 at 8.54.30 AM.png

Now its time to try Fresh Linux Mint and explore the new features.

Once I tried the new features, it is time to install my required software:

Step 1: Go to Update Manager and install all the suggested updates

Step 2: My required software

WordPress app

The app I use to write and publish my blogs (teaslegourd.wordpress.com). Download the app for linux (.deb) from –> https://apps.wordpress.com/desktop/ and install using package manager.

Iridium Browser

I prefer Iridium brower over Firefox.  Install the browser from the site https://iridiumbrowser.de/downloads/debian

wget -qO - https://downloads.iridiumbrowser.de/ubuntu/iridium-release-sign-01.pub|sudo apt-key add -
cat <

Once Iridium is installed, open the browser, go to setting and make Qwant search engine as default page –> https://www.qwant.com/

I also removed Firefox browser from the Software Manager. If required, it can be installed later.

Plank Dock

sudo add-apt-repository ppa:docky-core/stable
sudo apt-get update
sudo apt-get install plank

After installing to set preferences,use terminal and run

plank --preferences

Anaconda Python Distribution

Goto the following page https://www.anaconda.com/download/#linux and download the installer for Linux. I have downloaded Python 3.x version.

Goto terminal and run

 sh Anaconda3-5.2.0-Linux-x86_64.sh

In order to add desktop entry (short cut) to Anaconda Navigator, add the below code to a new file Anaconda in /usr/share/applications/

[Desktop Entry]
Version=1.0
Type=Application
Name=Anaconda-Navigator
GenericName=Anaconda
Comment=Scientific PYthon Development EnviRonment – Python3
Exec=bash -c ‘export PATH=”/home/srinivas/anaconda3/bin:$PATH” && /home/srinivas/anaconda3/bin/anaconda-navigator’
Categories=Development;Science;IDE;Qt;Education;
Icon=/home/srinivas/anaconda3/Anaconda.png
Terminal=false
StartupNotify=true
Name[en_IN]=Anaconda

In order to update Anaconda, use the commands from terminal

conda update conda
conda update anaconda orconda update --all

Anaconda has in-built tools like Spyder Developement Environment and Orange Data Mining. We can create similar  desktop entries for these as well and add them to plank.

Application paths:
Spyder -> anaconda3/bin/spyder
Orange -> anaconda3/bin/orange-canvas
Qt ->anaconda3/bin/designer
Icons: search in anaconda3/pkgs/ for png file

Sqlite Studio

Can be downloaded from the page -> https://sqlitestudio.pl/index.rvt Download the Linux (installer)

Pycharm Community Edition

Can be downloaded from https://www.jetbrains.com/pycharm/download/#section=linux

Installation Instructions as mentioned in the site:

Unpack the pycharm.tar.gz using the following command: 
tar -xzf pycharm.tar.gz and run pycharm.sh from the bin subdirectory

MongoDB Community Edition

Follow instructions from the page -> https://docs.mongodb.com/manual/tutorial/install-mongodb-on-ubuntu/#install-mongodb-community-edition

Robo 3T (Formerly RoboMongo)

Can be downloaded from -> https://robomongo.org/download

Moving files from Mac to VirtualBox

Go to Mac –> System Preferences –> Sharing –> check fil sharing. Under options, check ‘Share Files using SMB’ and ‘Share files using AFP’ as well as user

Note the IP address (aaa.bbb.c.d)

When Logged onto Mint, type smb://aaa.bbb.c.d.

Variety (Automatically changes wallpaper)

sudo add-apt-repository ppa:peterlevi/ppa
sudo apt-get update
sudo apt-get install variety


Upgrading to Linux Mint 18.3 (Sylvia)

Since last few months, I was using Linux Mint 18.2 (Sonya) as my favourite OS (installed on Macbook Pro as Desktop Parallel. You can visit this link for more information – Installing Linux Mint 18 Cinnamon (Sarah) on Macbook Pro).

After a while later, as soon as Linux Mint 18.1 Serena was made available, I tried upgrading to the same using the Update Manager.  However, once I upgraded ran and I restarted, all I could see was a blank screen. Even after multiple restarts, the situation was same. I felt this was the problem with Linux installation as Paralles Desktop on Macbook. I lost all the setup, installed apps and data. Had to reinstall Serena from scratch.

Ever since that happened, I hesitated to updrage from Serena (18.1) to Sonya (18.2) using the Update Manager. Hence, I reinstalled Sonya (18.2) as another VM and only after the entire setup was done on 18.2, I removed 18.1.

Recently, Linux Mint Sylvia (18.3) was released with many improvements New features in Linux Mint 18.3 Cinnamon Hence I am tempted to upgrade Sylvia (18.3). However to me, this means, reinstalling 18.3, all apps, and copying data. But this time, I want to take some risk. Worst case  scenerio, I can recover a week old version of backup of Sonya (18.2) from my Hard Disk using Time Machine.

As a first step, I updated the software on Sonya (18.2). Next step, upgrade Sylvia (18.3) using the Update Manager and kept my figers crossed after restart. As expected, process got struct at the Mint restart screen. Hence, I shutdown the parallels instance and restarted. To my surprise, I was able to login. The only difference is the parallels tools had to be reinstalled from within the Linux Mint 18.3

Screenshot from 2018-01-28 12-02-40

Feels happy that the upgrade happened without much effort.


KDE Neon – A Linux distro that glows

KDE is a good looking desktop environment among the other Linux DEs. I was looking for list of Linux distros where KDE is offered as major DE.

Recently, I tried installing KDE version of OpenSUSE on my Mac as Parallels OS. Installation was a success. However, while trying to install parallels tools on openSUSE, I faced some major challenges. Hence I had to uninstall the OpenSUSE. My search for KDE based Linux distros is on.

This is when I stumbled upon KDE Neon in the Distowatch website (https://distrowatch.com/table.php?distribution=kdeneon). KDE Neon is ubuntu based Linux distro and supposed to be always upto date w.r.t KDE Plasma updates.

You can download KDE here – https://neon.kde.org/download. I downloaded the  64 bit user edition ISO image and installed the same as a parallels desktop on my Mac. Installation was a cake walk. Next step was to install parallel tools. This was easy too – followed instructions given in the site – http://kb.parallels.com/en/121370

Below are some screenshots of KDE Neon. At this point, I just want to give a try to the distro, tweak the Desktop look and feel as KDE is a DE that is easily configurable to look differently.

This is indeed a simple and nice looking KDE distro worth giving a try.

Screen Shot 2017-01-26 at 10.39.19 AM.png

Screen Shot 2017-01-26 at 10.37.44 AM.png


screen-shot-2017-01-26-at-10-34-58-am

Screen Shot 2017-01-26 at 10.36.47 AM.pngScreen Shot 2017-01-26 at 10.37.20 AM.png


Get lucky with Luckybackup

Linux Mint Serena (18.1) comes with a default backup tool called – ‘Backup Tool’. However, when I tried to backup my Home directory using the same, it was getting struck at the ‘Calculating .. ‘ step and refusing to go further.

screenshot-from-2017-01-08-18-17-42screenshot-from-2017-01-08-18-18-12

Screenshot from 2017-01-08 18-40-41.png

Hence, I was forced to look for an alternative. Easy option was to search for backup tool in Software Manager. The first result and the ne with highest score (87) in Software Manager was ‘Luckybackup’, which is what I ended up installing.

It presents us with a simple UI. You need to add a task e.g., ‘Backup-Serena-2017-01-8’ after which there is option to choose Source and Destination (could be external hard disk). You may select the task from the task list, proceed to validate and then select the ‘Okay’ button.

screenshot-from-2017-01-08-18-29-16

screenshot-from-2017-01-08-18-24-39

Once the backup is done, you will be shown the result and the path where log file is saved. You may run through the log file to see if there are any errors and take appropriate steps.

Although, I have not explored the tool completely overall, Luckybackup seems to be a useful and simple tool for backing up your precious data.


Lost and found – Free data recovery tool called PhotoRec

It was a beautiful Friday morning in Bangalore a couple of weeks ago. The previous night I had a great idea to upgrade my Macbook Pro to the latest OS X Sierra. I wanted to take a backup of my entire Macbook Pro including the Linux Mint and eOS installed as Desktop Parallels to an external hard drive.

I just had one external hard disk (Seagate 1 TB) with me with some 550 GB personal data including documents, books, pictures, movies and music on it.

I wanted to take a backup of Mac and attempted to resize the external hard disk and partition it into two partitions using GParted. I started this task without complete knowledge of partitioning. Resizing seemed to have happened correctly but I failed to achieve the 2nd step ie., creating additional partition.

It was here, I made a  crucial and unforgivable mistake. With over confidence,  connected external hard disk to Macbook and then used a back up software called Time Machine. Time Machine application which then formatted the entire external hard disk to HFS+ format. I made a stupid mistake without thinking. It all was all over in a matter of 2 seconds. The damage was done. I did not know how to recover the data. I connected to Linux Mint and could not find any data. All the 550 GB data was lost in two seconds.

At this point of time, I did not know what to do. I quickly downloaded couple of trail software apps on Macbook to try and recover the lost data. There was no luck. I therefore approached a professional data recovery services company and gave my external hard disk. The person told me it will take lot of time to recover lost data. The recovery process is also expensive he needs to test in lab whether it is possible to recover or not.

I was following up with him for a couple of days and this is when the recovery services person told me that it is possible to recover. I had a hope. However couple of days later he informed me that there is a problem and he is unable to read the data from hard disk. Hence I had to take back the hard disk . Whatever hope I had was lost.

After a weak gone, I wanted to give a try myself. Hence I posted a question on Linux Mint Google plus forum for free or open source recovery software. Nine out of 10 people suggested me to try TestDisk software.

TestDisk (http://www.cgsecurity.org/wiki/TestDisk) comes with a companion tool called PhotoRec. At once, I installed TestDisk from Linux Mint Software Manager.

After installing TestDisk, i attempted reading from the external hard disk but it could not discover anything. There was a deep search option available but I was not sure. Hence I resorted to  companion software PhotoRec (http://www.cgsecurity.org/wiki/PhotoRec)

Both TestDisk and PhotoRec are command line tools. I went through the Step By Step wiki page of PhotoRec (http://www.cgsecurity.org/wiki/PhotoRec_Step_By_Step) and ran the tool from Command Line as root. After selecting the hard drive  (source) to retrieve data from and write to (destination), the tool was displaying 10 hours remaining as the time required to recover the data from entire hard disk.

su

photorec

The step by step instructions with screen shots are given in the above link. Hence, I won’t be repeating it here.

At this point, I went through the instruction once again and understood that we can choose the file types we wish to recover from the various file types supported (http://www.cgsecurity.org/wiki/File_Formats_Recovered_By_PhotoRec). There are more than 300 file formats’ recovery is supported by PhotoRec.

To me, it took roughly 10 hours to recover various document type, pictures, audio and video files totaling 770000 file in 1500+ folders that PhotoRec created in the process.

After this, I had to manually delete unwanted files/file types from the terminal by running delete command from the folders and sub folders.

Finally, I was happy to see my lost data (especially the Photos that are dear to me).

I want to thank the cgsecurity team for such a wonderful software and the Linux Miont Google Plus community friends who suggested me TestDisk/PhotoRec.

Elementary OS Loki

This week Elementary OS team has launched their latest stable release of eOS 0.4 code named Loki.

Elementary OS names its releases after Gods and Creatures of Norse Mythology (0.3 was known as Freya – symbolizing beauty, fondness of love).

The name Loki is unusual because it is described as wily trickster God in Norse Mythology http://norse-mythology.org/gods-and-creatures/the-aesir-gods-and-goddesses/loki/.

Anyway, I am a big fan of Elementary OS (http://elementary.io/) since Freya was released. I liked it mainly because of its simplicity and beauty.

Similar to Freya (and other Elementary OS releases), Loki is based on Ubuntu – Ubuntu 16.04 stable release to be precise.

Ever since beta is released, I am waiting eagerly for the stable candidate and at last it was available near to the same day as apple released announced iOS and OS X Sierra (What a coincidence) After all, Elementary OS describes itself as – “A fast and open replacement for Windows and macOS”

I downloaded Loki ISO from torrent:

magnet:?xt=urn:btih:535c241c5b14fdfe47bec6cbaac4a39cd41c719e&dn=elementaryos-0.4-stable-amd64.20160909.iso&tr=https%3A%2F%2Fashrise.com%3A443%2Fphoenix%2Fannounce&tr=udp%3A%2F%2Fopen.demonii.com%3A1337%2Fannounce&tr=udp%3A%2F%2Ftracker.ccc.de%3A80%2Fannounce&tr=udp%3A%2F%2Ftracker.openbittorrent.com%3A80%2Fannounce&tr=udp%3A%2F%2Ftracker.publicbt.com%3A80%2Fannounce&ws=http://sgp1.dl.elementary.io/download/MTQ3Mzk1NjMyNA==/elementaryos-0.4-stable-amd64.20160909.iso

It is about 1.3 GB. The installation was simple.

Major differences compared to Freya are:

  • UI or the desktop environment – Pantheon looks even more polished
  • Ubuntu 16.04 is built on the 4.4 series of Linux Kernels. Hence Loki is taking advantage of latest Linux Kernel
  • Noticed python 3.5.2 was also installed by default
  • Notification center is redesigned with DND (do not disturb) option
  • Epiphany is default browser (I had to quickly install Chromium as I was not able to login to WordPress or Google account on Epiphany browser)
  • There is a lightweight email client
  • Most of the apps are looking improved and fresh

Here are some of the screenshots of my Elementary Loki:

Desktop

Screenshot from 2016-09-15 21:15:27.png

AppCenter

Screenshot from 2016-09-15 22:09:58.png

Screenshot from 2016-09-15 22:10:10.png

Epiphany browser

screenshot-from-2016-09-15-221522

Mail Client

screenshot-from-2016-09-15-221649

Calendar

Screenshot from 2016-09-15 22:17:53.png

Music Player, Video Player

Screenshot from 2016-09-15 22:18:17.png

Overall, there is a great improvement over Freya in terms of look and feel design. Hope to see Loki improving further.

Installing Linux Mint 18 Cinnamon (Sarah) on Macbook Pro

At last, the wait is over. Baby Sarah has kicked it way out. Linux Mint 18 stable version was released on 30th Jun 2016. Like many other hardcore Linux fans, I have been waiting for this moment ever since Mint 18 was announced . There is an excellent feedback given on internet about Mint 18.

I am using Linux Mint 17.3 Cinnamon as regular use OS on my Macbook Pro installed as a VM Parallels Desktop ever since it (Rosa) was available (Dec 2015). I am very pleased with the performance and usability of Linux Mint. It is also highly customisable. Perhaps that is the reason for Linux Mint to be the top ranked Linux distribution in Distrowatch website (http://distrowatch.com/)

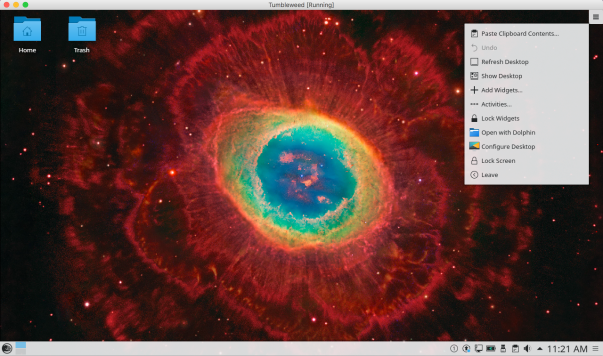
In the below screenshot, you can see Mint Linux on top right corner. I also have Elementary OS installed as a VM.

Screen Shot 2016-07-03 at 11.06.47 AM.png

In the last 6 months, I have installed several apps (such as WordPress, Vivaldi browser, Nylas N1 email PyCharm community edition, Google Earth, Comodo AV, My Weather, PlayOnLinux etc) and settled down on Paper Icon theme and ended up with a custom menu icon, startup/shutdown image. I installed Xubuntu, Kubuntu packages as well so that I can login optionally to XFCE or KDE or Cinnamon sessions (All part of my learning).

Screen Shot 2016-07-03 at 12.55.03 PM.png

Screen Shot 2016-07-03 at 12.31.54 PM.png

Mint 17.x was based on Ubuntu 14.04 stable and Mint 18 is based on Ubuntu 16.04 packages.

Normally, a major release (e.g., from Mint 17.3 to Mint 18) needs to be a freshly installed and upgrade option is provided only for minor releases (e.g., from Mint 17.2 to Mint 17.3).

However, as an exception, I am seeing a message on the official blog that upgrade instructions would be made available in future (http://blog.linuxmint.com/?p=3051 – “It will also be possible to upgrade from Linux Mint 17.3. Upgrade instructions will be published next month.”)

This is an excellent option. However, I am exited to try to the Mint 18 sooner and can’t wait any longer.

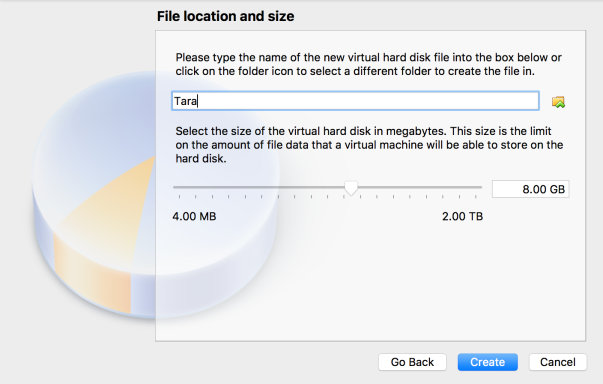
Hence I downloaded torrent file from Linux Mint site – (https://torrents.linuxmint.com/torrents/linuxmint-18-cinnamon-64bit.iso.torrent) and downloaded linuxmint-18-cinnamon-64bit.iso using µTorrent.

Screen Shot 2016-07-03 at 1.03.05 PM.png

Screen Shot 2016-07-03 at 1.03.47 PM.png

Screen Shot 2016-07-03 at 1.04.46 PM.png


Screen Shot 2016-07-03 at 1.17.38 PM.png

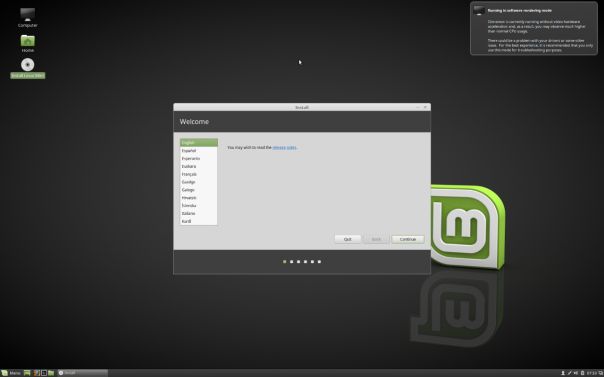
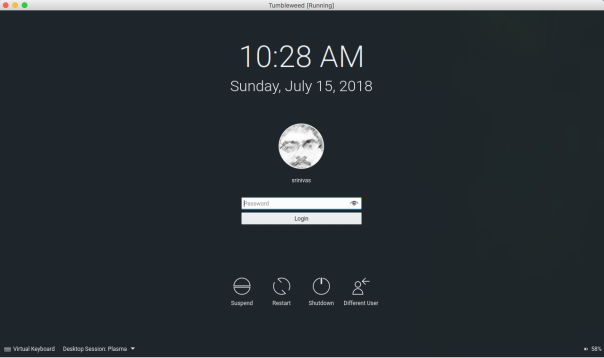
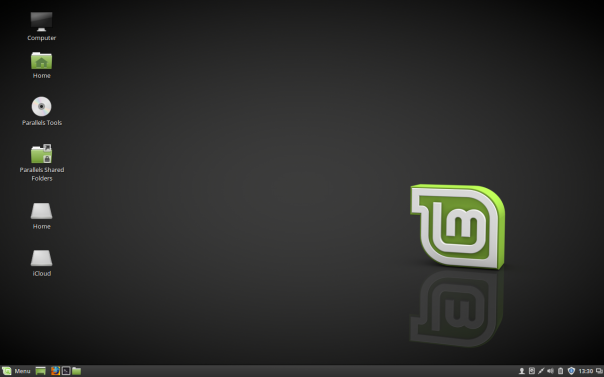
Below screenshot is post installation and just after first login:

Screen Shot 2016-07-03 at 1.19.14 PM.png

First thing I do after any installation is to install Parallels tools for my Linux. I do this from terminal and follow instructions given in the site – http://kb.parallels.com/en/121370

Reproducing the steps below just in case:

1. Open Linux Terminal window and login as root 
su
eject /dev/cdrom

2. Go to Parallels Desktop menubar > Devices > CD/DVD > Connect image…
Navigate to /Applications/Parallels Desktop/Contents/Resources/Tools
Click on prl-tools-lin.iso and click Open

3. Mount the Parallels Tools image to Linux virtual machine and verify:
mkdir /media/cdrom
mount /dev/cdrom /media/cdrom

 4. run the installation package:
cd /media/cdrom
./install

Screen Shot 2016-07-03 at 1.30.40 PM.png

I have selected the recommended update policy. I wish to keep my daily OS stable and optimized. Once this is done, I chose to update the packages.

Screen Shot 2016-07-03 at 1.44.48 PM.png

185 kB/s is the best internet speed I am experiencing in recent times. Today, I am lucky. There are occasions when internet gives me 2 kB/s and I find it difficult to even open the google page.

Screen Shot 2016-07-03 at 1.46.03 PM.png

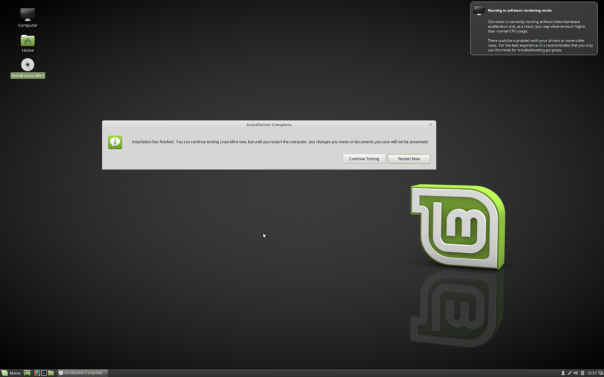
This completes basic installation of Linux Mint 18 Cinnamon desktop on Macbook Pro.

However, to bring to my current environment, I need to install multiple things.

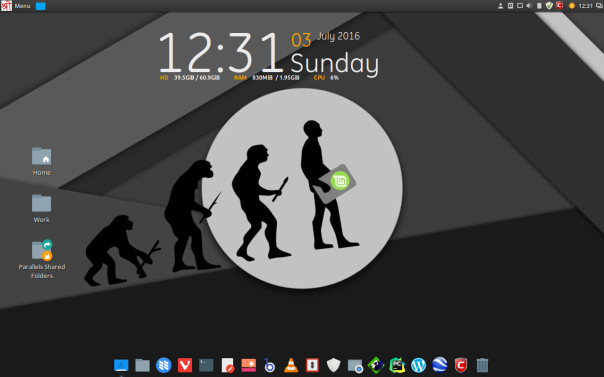
  1. Set up my current favorite desktop background (Evolution) and move Panel from bottom of the screen to top of the screen
  2. Change the menu image from mint image to RMS (Richard M Stallman) image
    • Right click on the Menu (Mint Image)
    • Select ‘Configure’
    • Select option ‘Use a custom Icon’
    • Browse for RMS.jpg Image and select
  3. Installing Plank dock
    • From the Synaptic Package Manager, select ‘plank (Simple, elegant, clean dock) ‘
    • Mark for installation and apply changes
    • Select plank as startup application
  4. Adding Conky Manager
    sudo apt-add-repository -y ppa:teejee2008/ppa
    sudo apt-get update
    sudo apt-get install conky-manager
    • Select ~/.conky/Gotham/Gotham
  5. Installing my-weather-indicator
  • Add my-weather-indicator a as startup application
    sudo add-apt-repository ppa:atareao/atareao
    sudo apt-get update
    sudo apt-get install my-weather-indicator

6. Installing wordpress desktop application

7. Installed Nylas N1 mail client

  • Download N1.deb from Nylas N1 website (https://nylas.com/)
  • Install using GDebi package manager

8. Change the start and shutdown logo (mint-logo.png) to custom logo

  • copy custom logo (rename as mint-logo.png) to the folder:
  • usr/share/plymouth/themes/mint-logo
  • backup original mint-logo.png as OLD_mint-logo.png
  • On terminal, run
    • sudo update-initramfs -u

9. Installing google earth

  • Followed instructions in the site https://itsfoss.com/install-google-earth-ubunu/
  • cd /tmp
    mkdir google-earth && cd google-earth
    wget http://archive.ubuntu.com/ubuntu/pool/main/l/lsb/lsb-invalid-mta_4.1+Debian11ubuntu8_all.deb
    wget http://archive.ubuntu.com/ubuntu/pool/main/l/lsb/lsb-security_4.1+Debian11ubuntu8_amd64.deb
    wget http://archive.ubuntu.com/ubuntu/pool/main/l/lsb/lsb-core_4.1+Debian11ubuntu8_amd64.deb
    sudo dpkg -i *.deb
    sudo apt -f install
    wget https://dl.google.com/dl/earth/client/current/google-earth-stable_current_amd64.deb
    sudo dpkg -i google-earth-stable*.deb
  • Dependancy issue in installing package  lsb-core_4.1+Debian11ubuntu8_amd64.deb
  • This was resolved by running
  • apt-get install -f

10. Installing Paper Icon theme

sudo add-apt-repository ppa:snwh/pulp
sudo apt-get update
sudo apt-get install paper-gtk-theme paper-icon-theme

11. I want to learn Python programming. Pycharm is useful IDE for Python programming.

I have downloaded pycharm community edision (which is free and opensource) from https://www.jetbrains.com/pycharm/download/#section=linux and followed the installation instructions given in the site

  • Copy the pycharm-2016.1.4.tar.gz to the desired installation location
    (make sure you have rw permissions for that directory)
  • Unpack the pycharm-2016.1.4.tar.gz using the following command:
    tar xfz pycharm-2016.1.4.tar.gz
  • Remove the pycharm-2016.1.4.tar.gz to save disk space (optional)
  • Run pycharm.sh from the bin subdirectory

12. Installing additional desktop environment/sessions. To install KDE, XFCE over existing Cinnamon DE, using synaptic package manager, search for the desired desktop and mark the same for installation

  • XFCE session -> xubuntu-desktop. This will install the associated packages along with main package. I selected light DM.

Screenshot from 2016-07-07 20-42-55

  • KDE session -> kubuntu-desktop.

Screen Shot 2016-07-06 at 4.52.28 AM.png


Screen Shot 2016-07-06 at 4.54.05 AM.png

I ran below to upgrade to latest version of plasma.

sudo add-apt-repository ppa:kubuntu-ppa/backports
sudo apt-get update && sudo apt-get dist-upgrade
sudo apt-get install kubuntu-desktop

Last command is redundant (and says kubuntu is already installed)

Screenshot from 2016-07-07 20-45-42.png

13. Comodo Antivirus –> Some Linux users may feel antivirus software is NOT required. However to be on safer side I installed Comodo AV.

Screenshot from 2016-07-06 10-40-19.png

14. MS Office with PlayOnLinux. Although, Libre Office is an excellent product, it does not help opening some macro enabled MS office file (e..g, xlsm file) and sometime, you need to work on MS Office 🙂 Therefor, you can use PlayOnLinux (front end for Wine) to intall MS office.

  • Install playonlinux (POL) from Software Manager

Screenshot from 2016-07-06 10-51-51.png

  • Install MS Office
  • Encountered the below error:

Screenshot from 2016-07-06 12-48-52.png

  • sudo apt-get install winbind
  • After this, once again try installing Office. POL will automatically download Wine and other associated packages
  • Once installation is successful, register the license using change product key option in any one of the office products (this is under file->help) as POL does not support the product registration at this point of time.

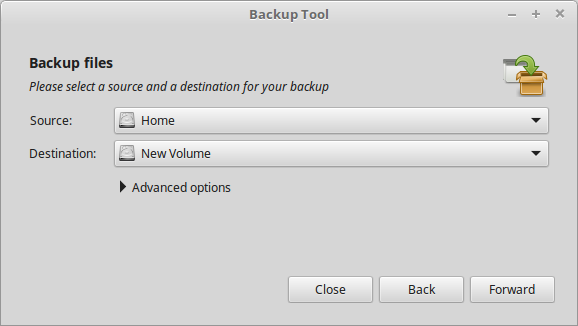
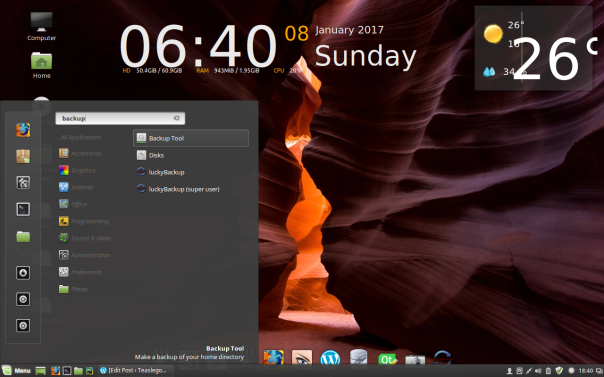
15. Installing timeshift for backup of Linux Mint (as this is a regular used OS, it is better to take frequent snapshots)

sudo apt-add-repository -y ppa:teejee2008/ppa
sudo apt-get update
sudo apt-get install timeshift


SeaMonkey – All in one application suite

Today, I installed Seamonkey internet application suite (Browser, Mail Client, IRC Client and Composor) on my Linux Mint 17.3 Cinnamon desktop

It can be downloaded from http://www.seamonkey-project.org/releases/

I downloaded the Linux/x86_64 .tar.bz2 and followed installation instrctions specified in the Seamonkey site:

  1. Create a directory named “seamonkey2” (mkdir seamonkey2) and change to that directory (cd seamonkey2).
  2. Click the link on the site you’re downloading SeaMonkey from to download the package (seamonkey-2.*.tar.bz2) file into the seamonkey2 directory.
  3. Decompress the file with the following command:tar jxvf seamonkey-2.*.tar.bz2This creates a “seamonkey” directory under your seamonkey2 directory.
  4. Change to the seamonkey directory (cd seamonkey).
  5. Run SeaMonkey with the following command:./seamonkey

Step 5 above is to launch from the terminal, If you need to launch from menu,

  1. Navigate to /usr/share/applications folder as root user (right click in this folder ans select – ‘Open as Root’ option. Enter root password)
  2. Create a new file called Seamonkey.desktop
  3. Edit the file with a Text Editor and the following entries. Save and exit.
[Desktop Entry]
Type=Application
Name=SeaMonkey
Exec=/home/<username>/seamonkey2/seamonkey/seamonkey
Icon=/home/<username>/seamonkey2/seamonkey/chrome/icons/default/seamonkey.png
Terminal=false
Categories=Internet;

Now, you can see the SeaMonkey shortcut from Menu.

You can also see it added to my dock at the bottom

Screenshot from 2016-06-12 17:04:24.png

Below is a screenshot of browser: In the bottom of the browser window bar, you can see launch options for – browser, mail, composer, address book and IRC chat

Screenshot from 2016-06-12 17:07:52.png

Screenshot from 2016-06-12 17:14:58Screenshot from 2016-06-12 17:15:57Screenshot from 2016-06-12 17:16:27Screenshot from 2016-06-12 17:17:21

Overall SeaMonkey is an interesting suite of apps. It is also opensource and free to install.